Tech Tip: Add and Editing User Property in the Constraints Browser
In Design Force, using the “Constraints Browser,” users can edit Component User Property.
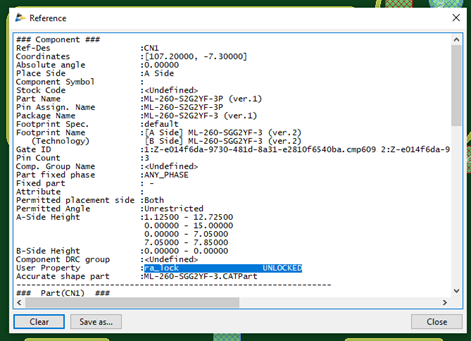
For example, User Property “ra-lock”.
The following video and steps will show how to do so.
Steps:
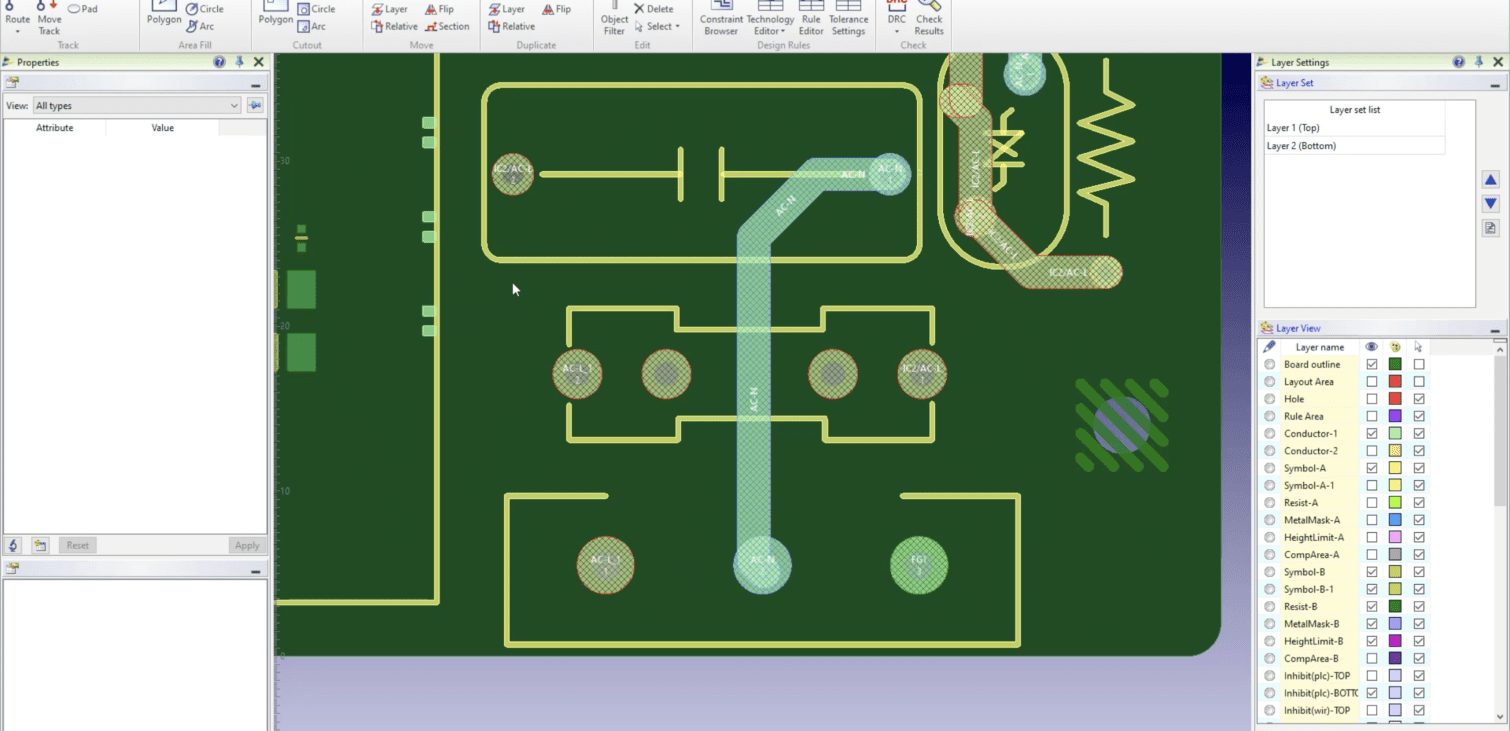
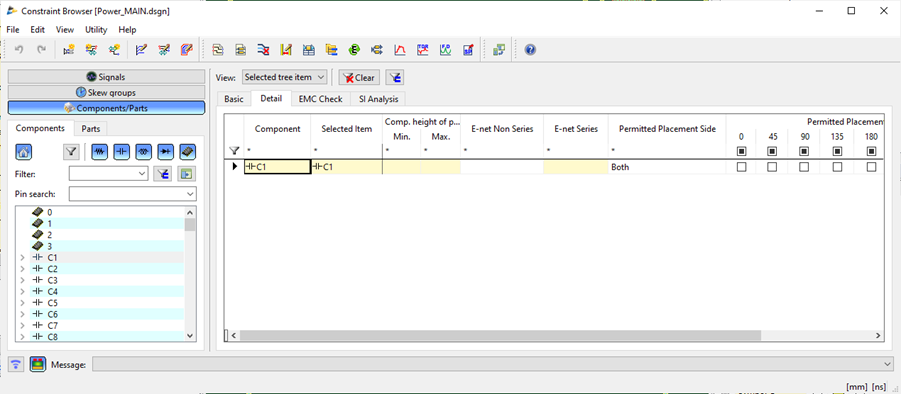
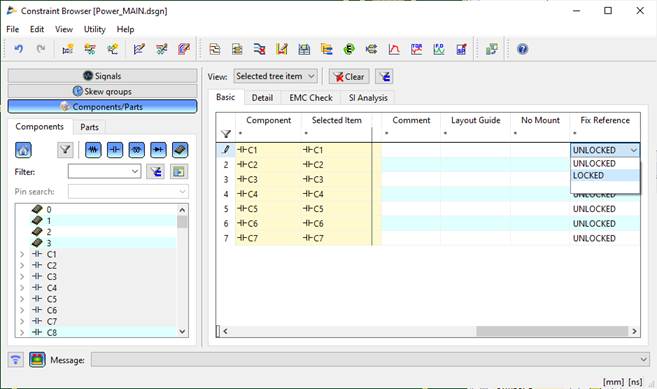
Open the Constraint Browser and select [Components/Parts]. You probably will not see the User Property “ra_lock”.
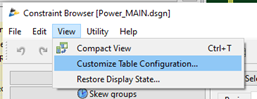
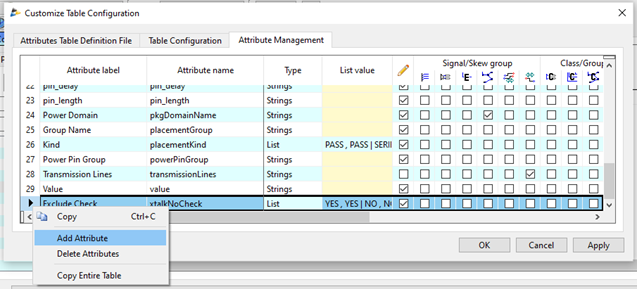
In that case, we need to add it by [View] > [Customize Table Configuration…].
Customize Table Configuration dialog will open. Under the [Attribute Management] tab, select the last line, right-click, and from the assist menu select [Add Attribute].
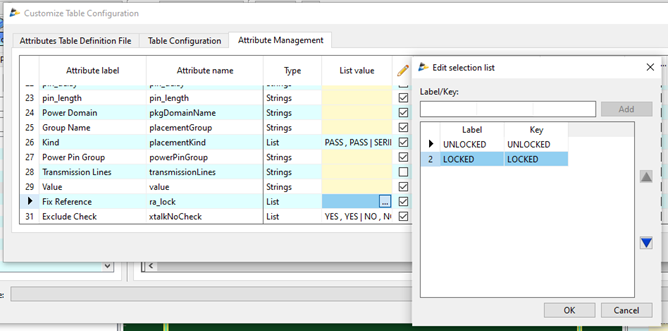
Type in the “Attributes label” and “Attribute name”. Change “Type” to “List”, then set the “List value”.
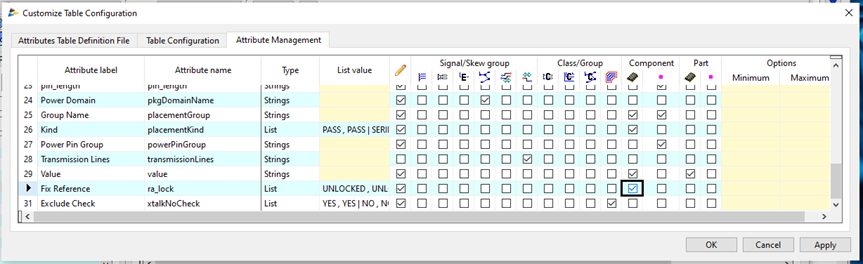
Put the check mark ON for “Component”. Click [Apply].
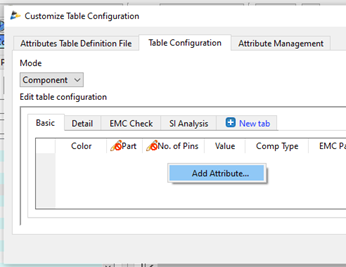
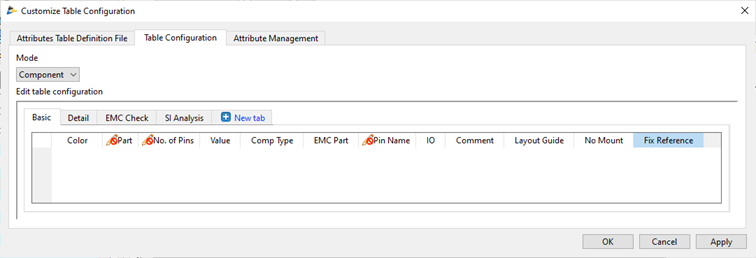
Select the [Table Configuration] tab and select “Component” for Mode.
In “Edit table configuration”, right-click, and from the assist menu select “Add Attribute…”.
The [Attributes] dialog will open. Type in “reference” for [Filter (attribute label):]. Select “Fix Reference” then click [Add] and [Close].
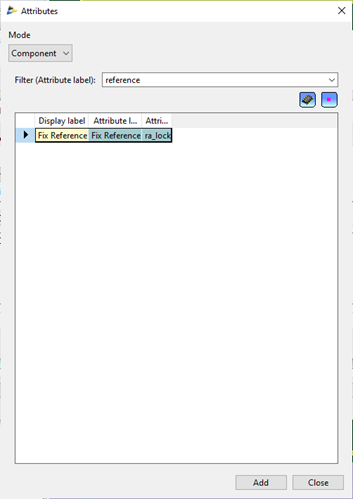
“Fix Reference” gets added under the [Basic] tab for Component. Click [OK] to close the dialog.
In Constraint Browser, now you can change the setting of each component for User Property “ra_lock”.
This adding User Property or any Property to Constraints Browser can be used for Signals as well.
-
Applications Engineer


- Blog

- Blog

- Blog

- Blog