Creating customised E3.series reports in 8 easy steps
The new E3.ReportGenerator is a free tool for creating customised reports from E3.series projects.
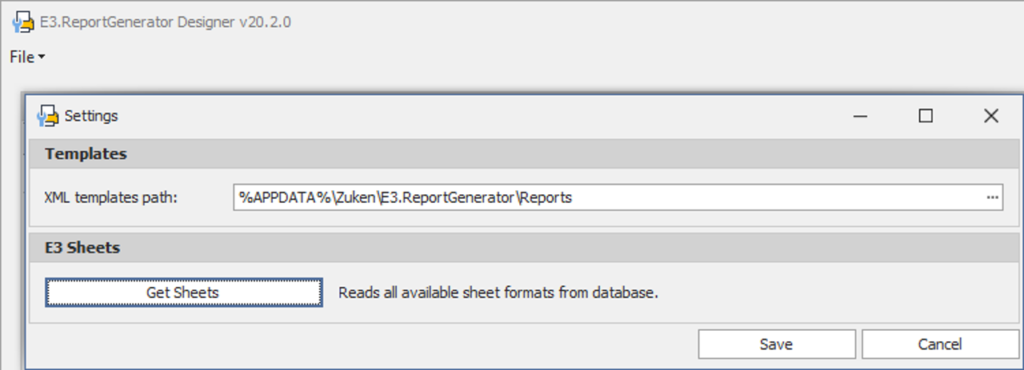
Step 1: Starting the tool and loading the sheet formats
First, we have to launch the E3.ReportGenerator Designer directly from E3.series and load the available sheet formats from the E3.series database.
Step 2: Setting the baseline information
In the next step, we set the report type, name, and description.
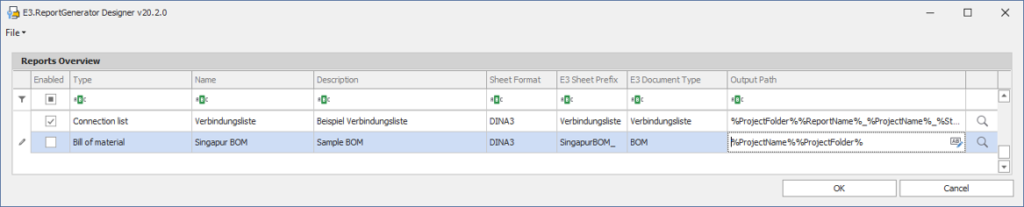
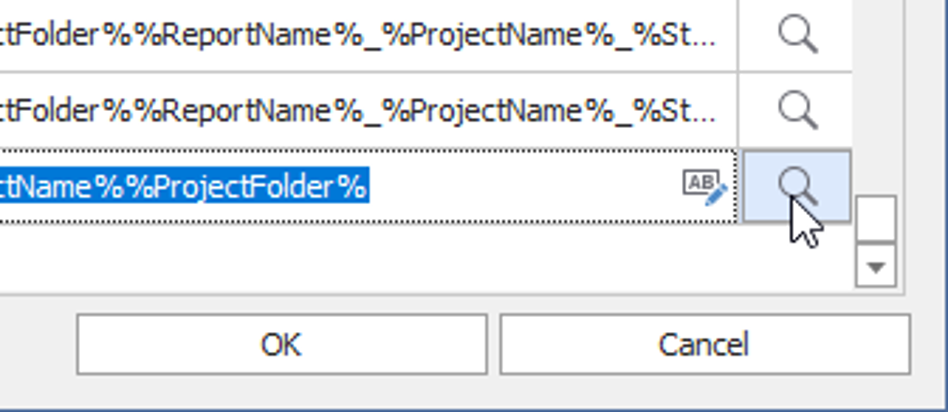
Step 3: Saving the report template
Afterward, we save the new entry and restart the Designer to customize the empty template graphically. With a click on the magnifying glass, the created template can be edited straightaway.
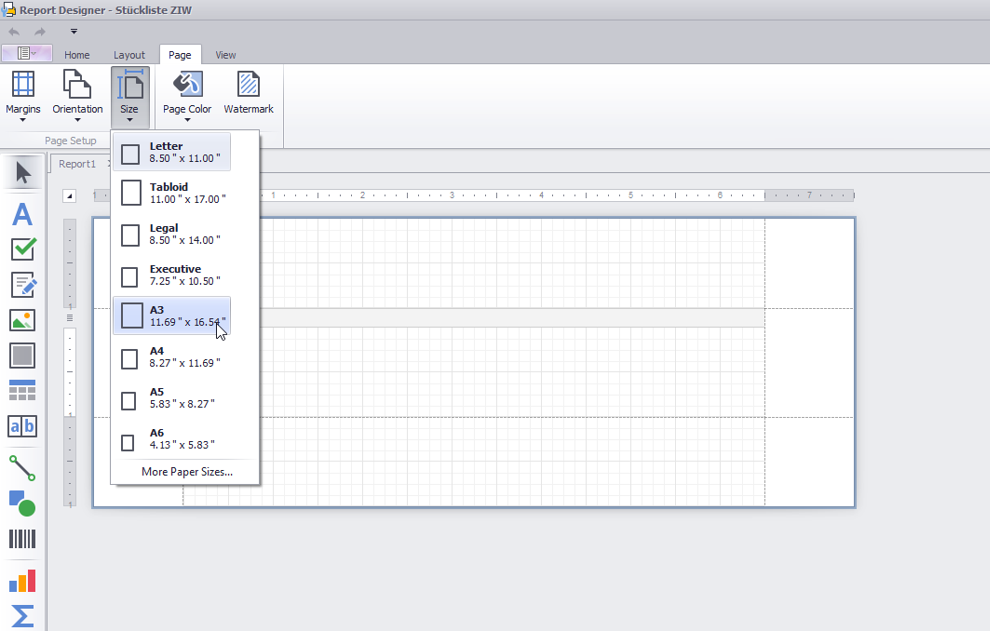
Step 4: Defining the page size
We now define the actual size, the page size, of the report – the sheet size from step 1 referred only to the sheet in E3.series. I’d like to point out that the page margins must enclose the sheet frame of the E3 sheet so that the report fits into the drawing area.
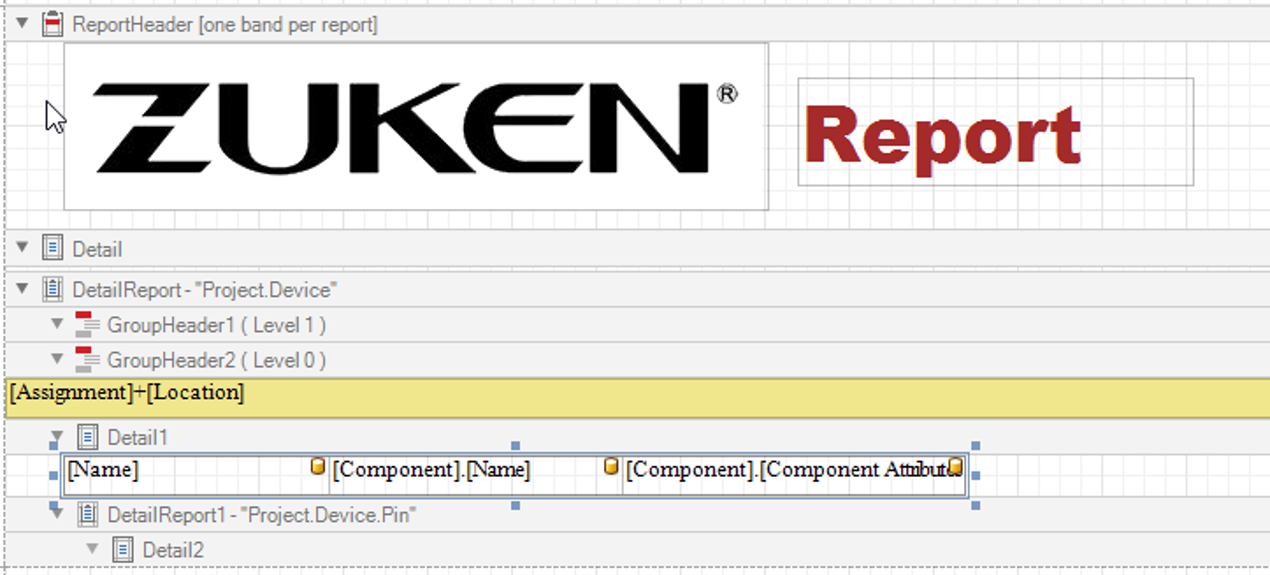
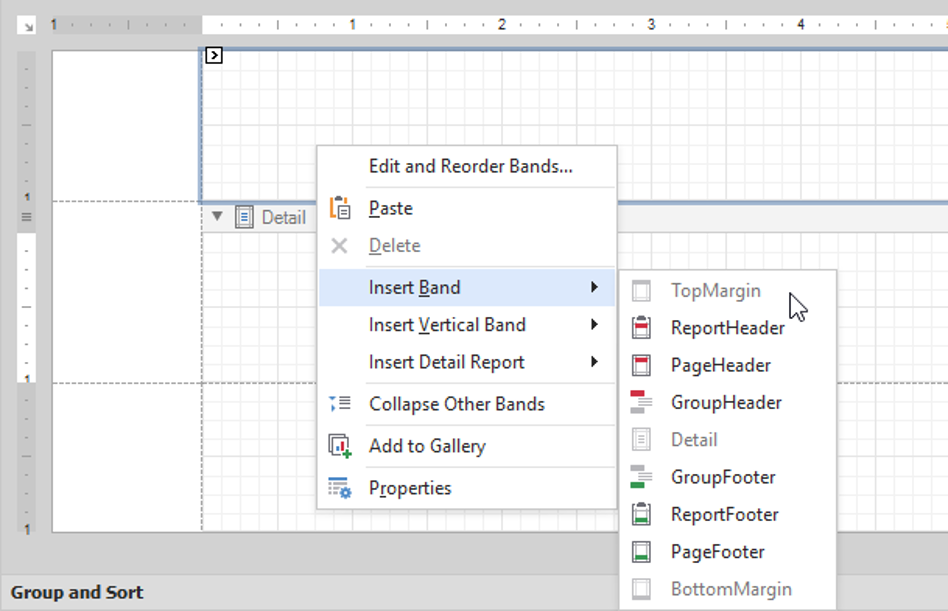
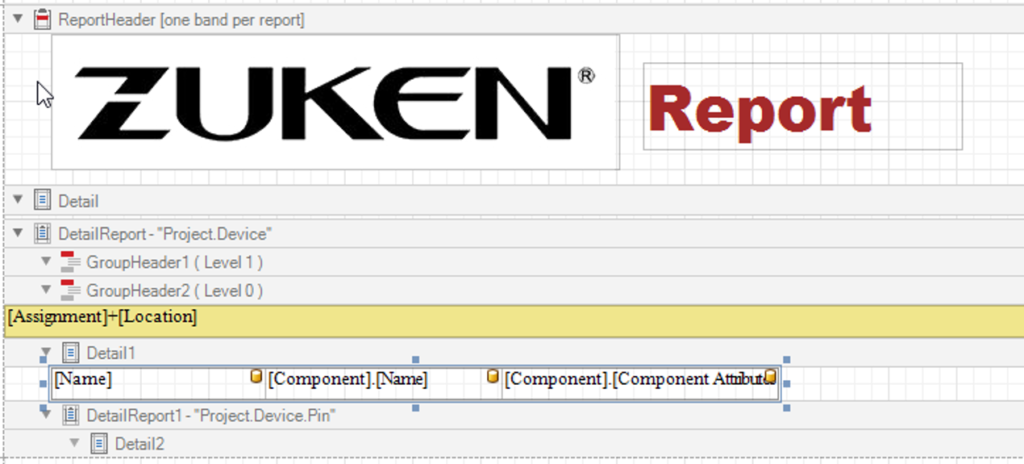
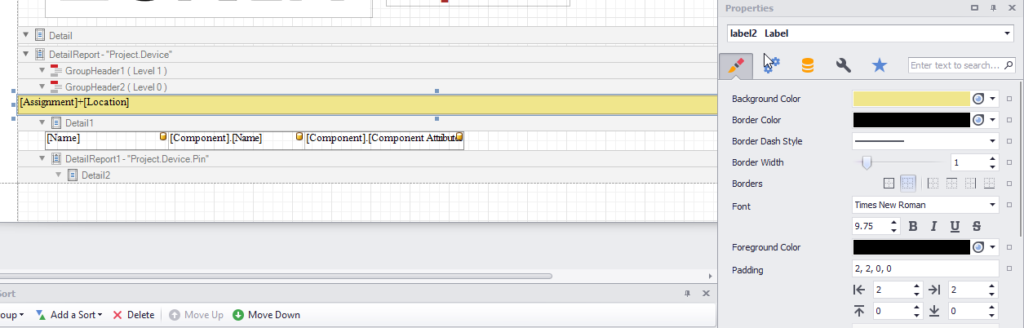
Step 5: customising the report layout
Step 6: sorting & grouping
Step 7: adding formatting
The E3.ReportGenerator offers the option to add formatting for text and table rows under properties. At this point, we need to save the report template and close the Designer application window before exporting the report in the last step using the Creator.
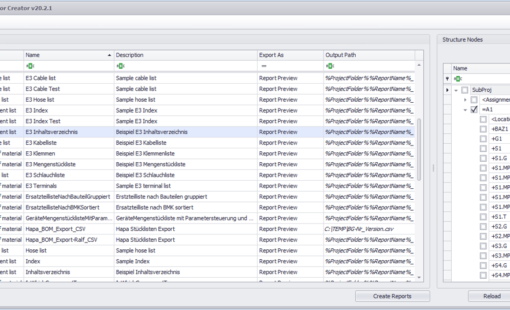
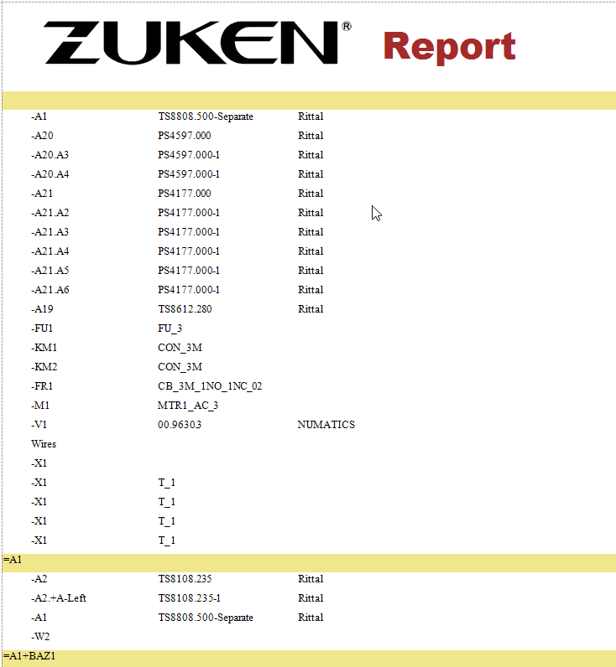
Step 8: Output of the finished report
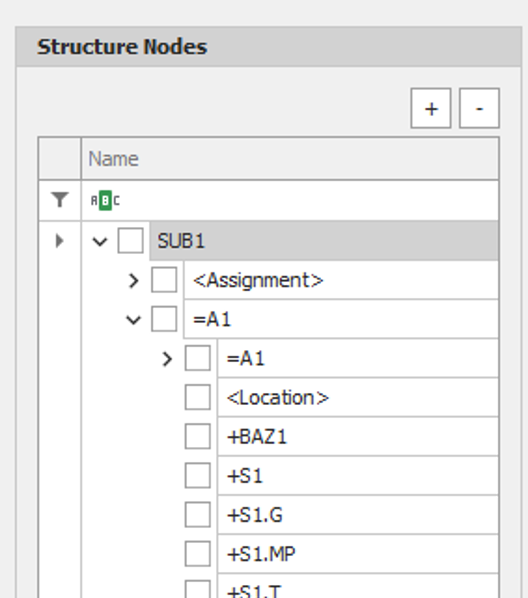
In the final step, we need to open the report in the Creator. A significant advantage here is that the report can be output only for certain structure nodes. We can select the output formats in the preview mode. Optionally, watermarks (e.g. “confidential”) and scaling can also be applied.
Finally, we select the output format and generate the report.
For a complete tour of all the key features of E3.ReportGenerator, watch our on-demand webinar.