
Defining Cable Ducts
Cable ducts are special devices, used in E3.panel that can be created dynamically by the user without any definition as well as with definition in the database. These cable ducts can be created and placed on panel sheets.
To define a cable duct, start the Database Editor.
There are two possibilities to create a cable duct:
-
The easiest way of creating a new cable duct is to base it on an existing one and modify it. To do so, select the New command from the context menu of an already existing cable duct, displayed by right-clicking on a cable duct in the Model or Component tree view of the Database Window, or by right-clicking on the column header with an existing cable duct highlighted. This method will create a new cable duct based on the selected cable duct.
-
To create a completely new cable duct, with no cable duct highlighted, select the New Model command from the context menu displayed by right-clicking on one of the headers of the Database Window. This method is used to create a new cable duct from the scratch.
Creating a new cable duct
Select the New Model command from the context menu displayed by right-clicking on one of the headers of the Database Window.
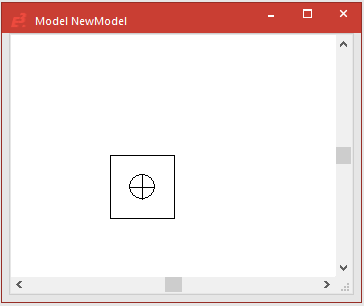
A new working area (drawing sheet) named Model NewModel# is created. Its size depends on the size defined in the Tools -> Settings -> Database Editor -> Model dialog box.
The grid display can be activated using View -> Rulers and/or Grid and modified using Tools -> Settings -> Database Editor -> Model.
To start creation of the new cable duct now, proceed as follows:
Model name, type and description
-
Establish the model's name, type and its description: in the working area's context menu, activate the Model Propertiesdialog box to define the model's type and assign the model a name (52 characters) as well as additional attributes.
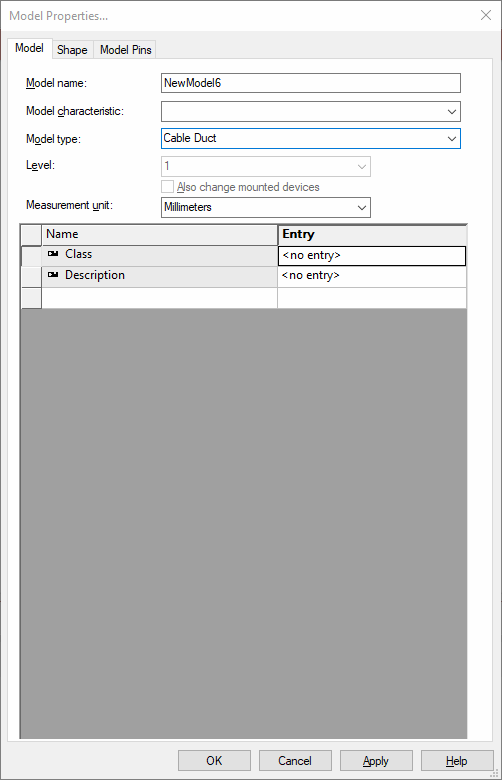
As the type defined is Cable Duct, applying the modifications automatically transfers the cable duct shape to the drawing sheet.
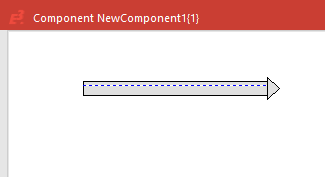
Example for a normal cable duct:

Example of a cable duct inlet/outlet:

Origin
-
- The physical zeropoint of the new cable duct is placed on the lower left corner of the cable duct. It is fix and cannot be edited.
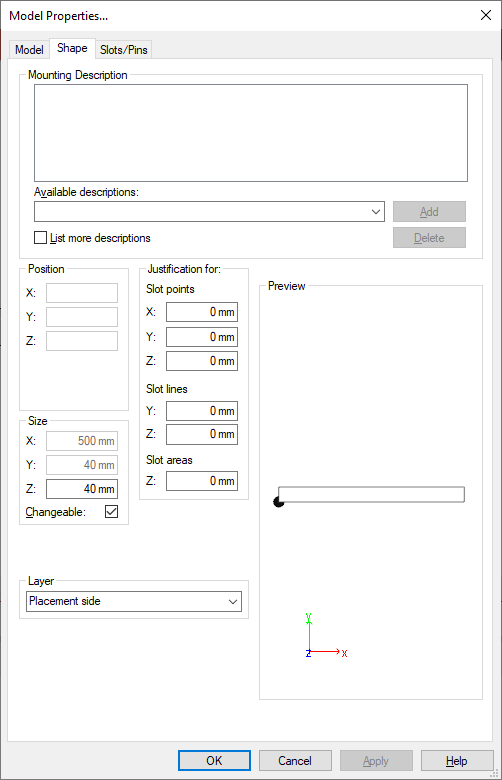
Model shape
-
The initial cable duct's space requirement is depicted by a square located around the original origin location.
As soon as the cable duct is placed in the working area, the space requirement is automatically adjusted to the default shape. Further definition or adjustment is not necessary.
-
The cable duct's shape can be defined in the Model Properties - Shape dialog.
-
The Model Properties - Slots/Pins tab offers the possibility to define the slot's cable duct properties.
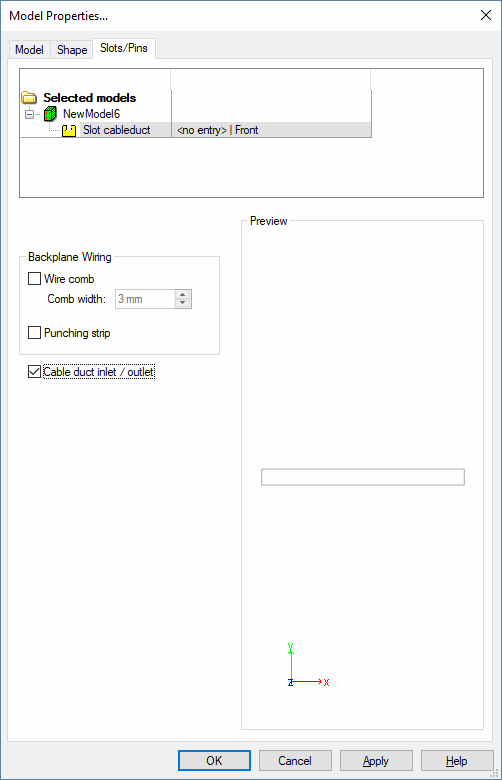
The Wire comb option defines the cable duct as a wire comb for backplane wiring
The Punching strip option defines the cable duct as a punched rail for backplane wiring.
The Cable duct inlet / outlet option defines the cable duct as inlet/outlet of a cable duct.
Finally, the cable duct's model can be saved to the database by means of the Save to Database command from the object menu.
All coordinates of the model's objects are saved in the database as relative to the model zeropoint.
Component definition
The next step is to create the component:
-
Select the New Component command from the context menu displayed when right-clicking on the column header of the Database Window's Component view.
The Component Wizard will be started.
-
Select the Standard device as Type in the Identification dialog. Define the cable duct's Name, Device letter code, etc..
-
In the Properties dialog, define the attributes desired.
-
The Completely new structure option is already checked in the Structure dialog.
-
Select the Edit component graphically option in the Complete dialog.
-
A new working area (drawing sheet) named Component <Name># is created. Its size depends on the size defined in the Tools -> Settings-> Database Editor -> Component dialog box.
The grid display can be activated using View -> Rulers and/or Grid and modified using Tools -> Settings -> Database Editor -> Component.
-
Define the sheet format, if necessary, in the Working Area Properties.
-
Then, select the previously created model and place it on the drawing sheet.
Finally save the newly created cable duct to the database using the Save to database command selected from the context menu displayed when right-clicking anywhere on the sheet.