
Defining Sheets
The easiest way of creating a new sheet border is to modify an existing one:
-
In the Misc View of the Database Window, right-click on the sheet, most like the one you are trying to create, and select New from the context menu. This will start the Database Editor and load in a copy of the existing border, ready for any modifications that have to be made.
To create a completely new sheet, select
-
the New Symbol command on the object menu by right-clicking on the header of the 'Symbol' column in the 'Symbol' View of the Database Window
-
or the New command on the object menu of a symbol by right-clicking on a symbol in the 'Symbol' View or 'Misc' View of the Database Window or by right-clicking on the column header.
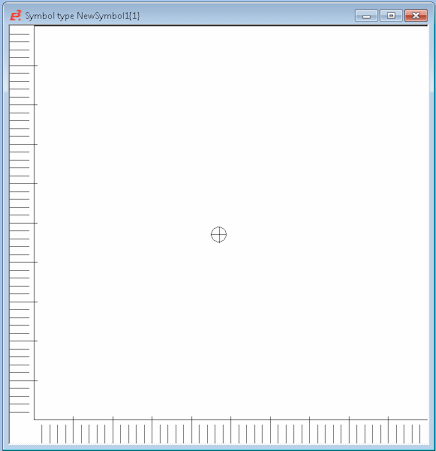
A new working area (drawing sheet) named Symbol Type NewSymbol#' is created and you can create the graphics that comprise the sheet border. Its size depends on the size defined in the Tools -> Settings -> Database Editor -> Symboldialog box.
The grid display can be activated using View -> Rulers and/or Grid and modified using Tools -> Settings -> Database Editor -> Display.
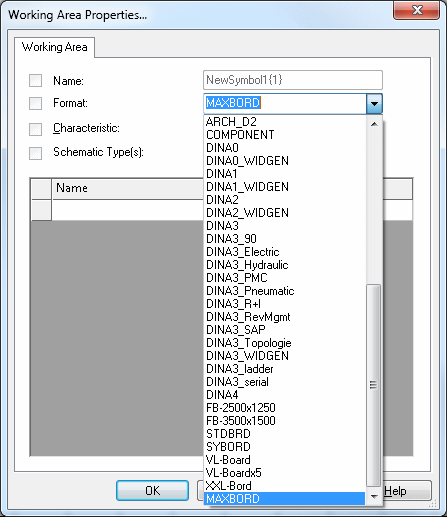
Note that when selecting the New command for creating a new symbol, the size of the sheet used has to be defined.
Right-click on the sheet and select the Sheet Properties... command from the displayed context menu.
Select a system sheet that is large enough to accommodate the drawing sheet being created.
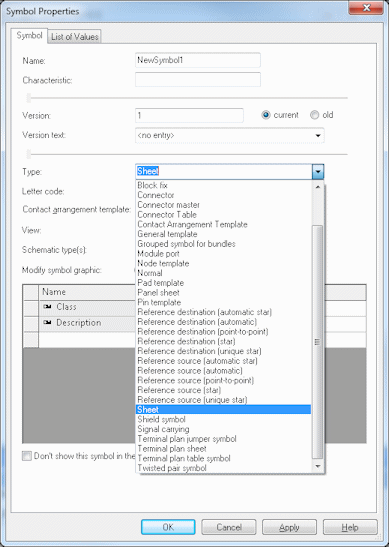
In addition, you have to define that the symbol is a sheet and not an ordinary symbol.
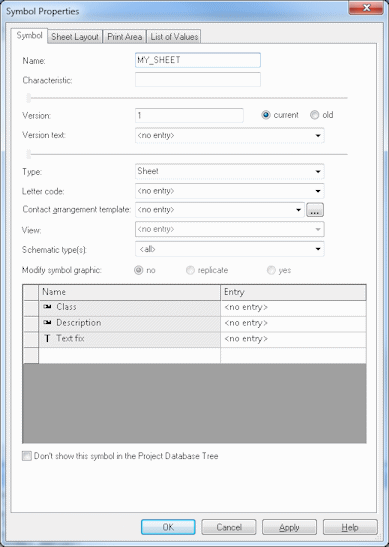
To do this, right-click on the sheet and select the Symbol Properties... command.
In the Type drop-down list select 'Sheet' as the type of symbol and press 'Apply'.
The next step is to create the sheet graphics. Using the Graphic toolbar the sheet's outlines etc. can be drawn. The company's logo can also be drawn on the new sheet by means of Import - Image.
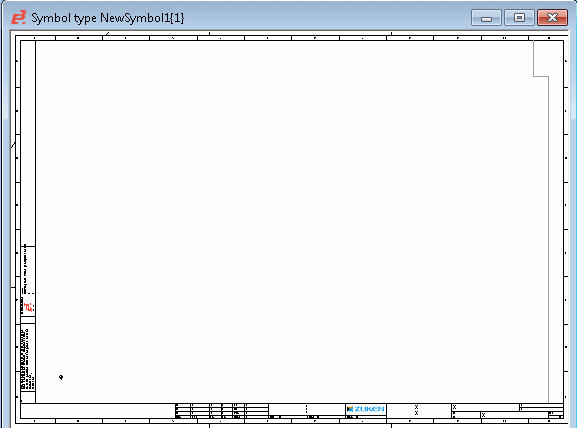
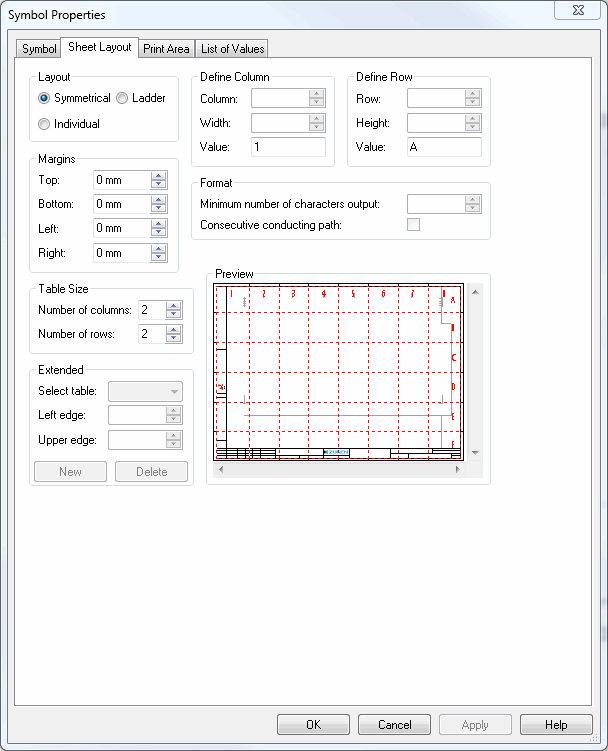
The next time you open the Symbol Properties dialog, you will see that there is an additional Sheet Layout tab for defining the cross-reference grid sizes.
See also: Defining Sheets -> Sheet Layout
Once the graphics are complete, the various Text Nodes can be added to the sheet, for example:
-
Drawing number,
-
Project name (file name of the project)
-
Project path name (directory name and drive name of the project)
-
Project file name (full name of the project, i.e. path, file name, extension)
-
etc.
This is done by selecting the Text button  on the Database Symbol Text toolbar.
The Insert Text dialog is displayed and the required sheet text nodes can be selected from the drop-down list and placed on the drawing border sheet as required.

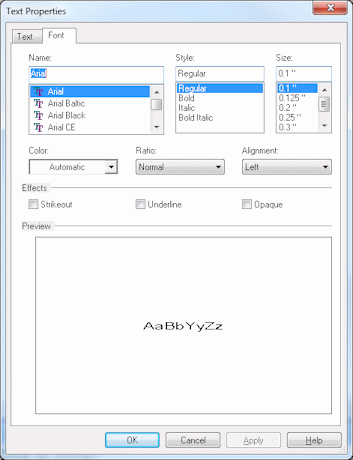
The format of the Sheet Text can be checked and modified by right-clicking on an already placed text node and selecting the Text Properties...command, or by selecting the Format -> Text Properties command on the Main Menu bar to display the Text Properties dialog.
Here you can change any of the text node properties and apply the changes to any text nodes that have already been placed.
The various text nodes are defined in the database and can be viewed, edited, or new ones added by selecting the Format -> Text Types command on the Main Menu bar.

To complete the sheet, it should be given a name in the Symbol Properties dialog and, in the Class field, an entry should be made, e.g. 'sheet', so that the sheet can easily be located in the corresponding folder (sheet) in the Misc Tree View of the Database Window.
By selecting the Text Type buttons Num, Typ or Text on the Database Symbol Text toolbar you can clearly see the type of text that will be displayed when the border is used.

Defining drawing area within sheet
The Sheet Drawing Area button  in the Database Symbol toolbar allows you to define a drawing area within the sheet. The grid will then only be drawn in that area and not across the whole sheet.
The new sheet can now be saved to the database by right-clicking on the sheet and selecting the Save To Database command.