
Customize - Toolbars
Toolbar buttons can be rearranged and changed.
How to open the "Customize - Toolbars" dialog
-
Select the Tools -> Customize... command from the main menu bar, and
-
switch to the Toolbars tab.
The following dialog box appears:
Image: Dialog "Customize - Toolbars"
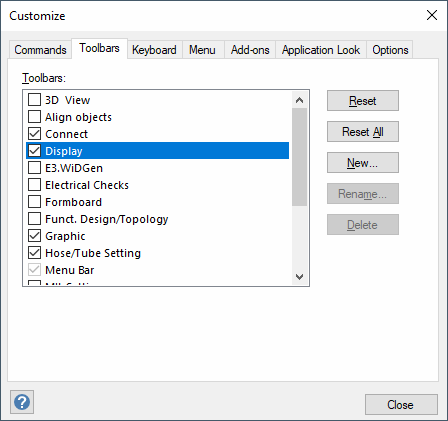
Description of the dialog "Customize - Toolbars"
Toolbars
This field displays all existing toolbars in the program.
By activating or deactivating the checbox the toolbars can be displayed or hidden in the project.
The following toolbars are available by default:
Project mode
-
Menu Bar (main menu)
Database Editor mode only
-
Menu Bar (main menu)
Reset
The Reset button resets all modifications (e.g. the arrangement of the buttons) to the selected toolbar and returns the toolbar to its original state.
Reset All
The Reset All button resets the modifications (e.g. the arrangement of the buttons) to all toolbars and returns the toolbars to their original states.
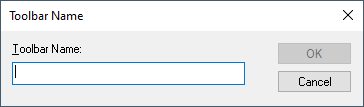
New...
The button opens the Toolbar Name dialog to define the name of the new toolbar.
Afterwards, the displayed commands can be dragged from the Commands dialog into the new toolbar using Drag & Drop.
Image: Toolbar Name
The number of user-defined toolbars is limited to 10. For example, it's possible to define user-specific add-ons as a toolbar.
Image: Tools

Rename...
User-defined toolbars can be renamed. The Toolbar Name dialog appears to modify the name.
Delete
User-defined toolbars can be deleted.
Generally, all commands can be added to any toolbar by selecting the desired category from the Commands tab and dragging the command from this dialog field onto the desired toolbar.
Buttons can also be displayed or hidden directly from the toolbar. To do so, left-click on the arrow on the right side of the desired toolbar and select the Add or Remove Buttons command from the displayed menu.
Image: Open context menu
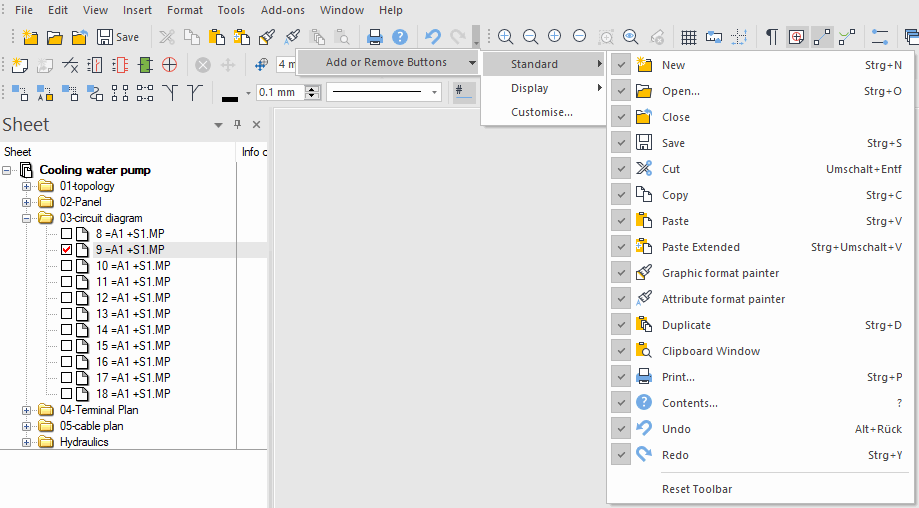
The Reset Toolbar command displayed in this menu resets the toolbars even if the Customize dialog was deactivated by the registry key.