
Defining Symbols
After having defined the required symbols, the next step is definitions of components.
Adding Functional Units to a Symbol
To add the newly created or edited functional unit to a symbol
-
right-click on a symbol in the Component or Symbol tree of the Database Window and select the command New or Edit from the displayed context menu.
-
The symbol appears in the workspace for editing,
-
right-click on the symbol sheet and then select the command Functional Assignment... in the context menu,
-
switch to the tab Functional Assignment,
-
select the previously created functional unit from the drop-down list Functional Unit:
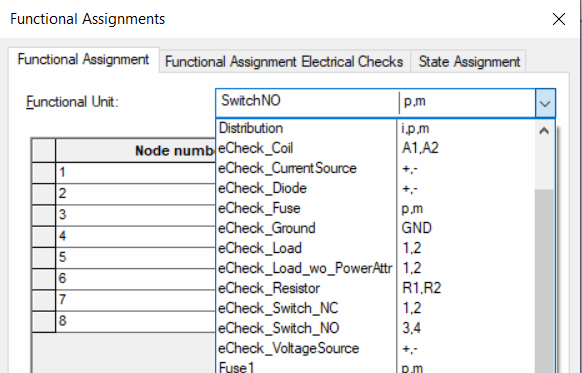
No other steps are required for the functional assignment of the following functional units:
-
Resistor
-
Fuse
-
Diode
-
Ground
-
Current Source
-
Voltage Source
Adding Functional Units with State to a Symbol
Note
This step is also required when functional units with states have been added. This is only possible with the following functional units:
-
Load
-
Switch
-
Coil
-
Current Source
-
Voltage Source
To add functional units with state to a symbol
-
select the previously created functional unit from the drop-down list Functional Unit,
-
to the right of the drop-down list, select the number of functional units,
-
click the button Add to add the selected functional unit(s):
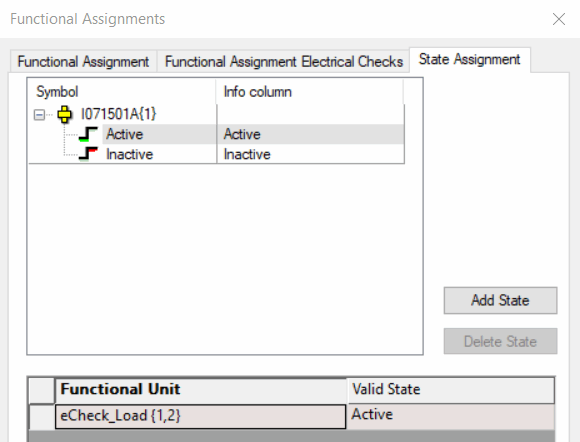
Example 3: 'Load'
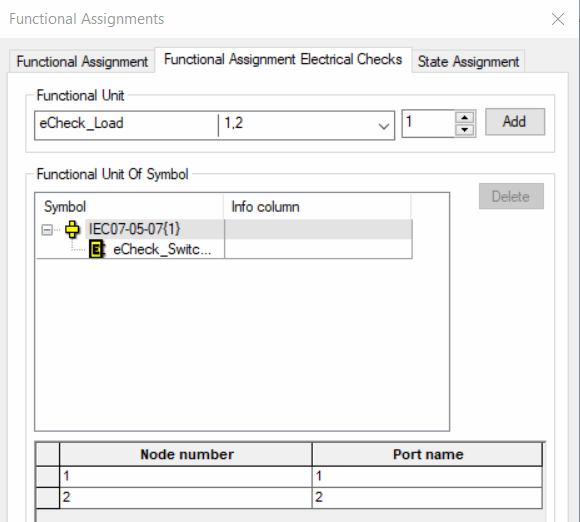
(Functional unit template from database: eCheck_Load)
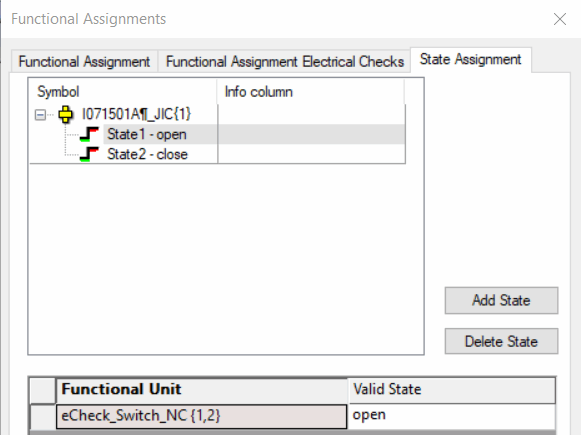
Example 4: 'Switch'
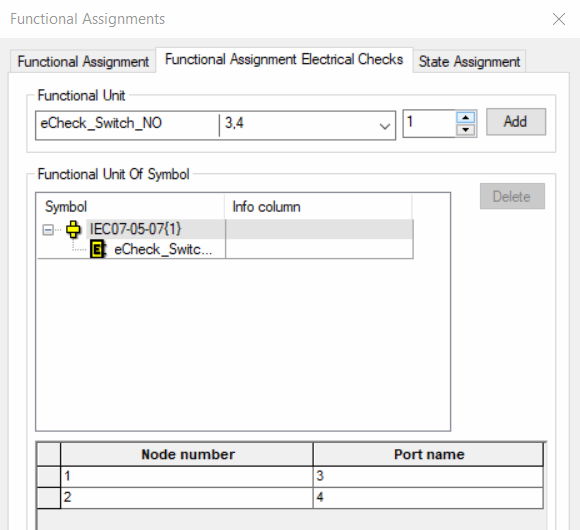
(Functional unit templates from database: eCheck_Switch_NC or eCheck_Switch_NO)
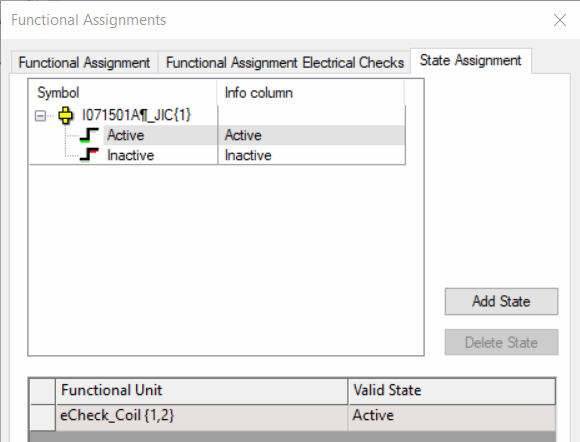
Example 5: 'Coil'
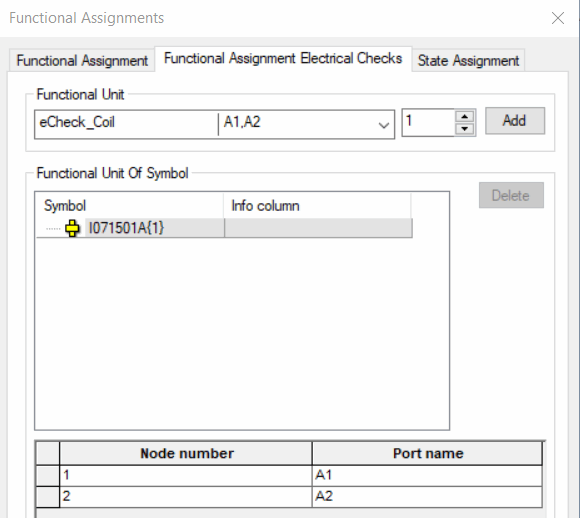
(Functional unit template from database: eCheck_Coil)
Note
-
The functional unit is added to the symbol in the form of an eCheck symbol
 .
. -
Check whether the node numbers are assigned the right port names.
Adding 'Symbol State' and Assigning 'Functional Unit State' to 'Symbol State'
Note
This step is only required when functional units with states have been added.
At first, add the 'symbol states'. Next assign a 'functional unit state' to the individual 'symbol states'. To do so,
-
right-click on the symbol and select the command Functional Assignment... from the displayed context menu,
-
the dialogFunctional Assignments appears,
-
click on the button Add state to add one or more 'symbol states',
-
assign a name to the 'symbol state' by pressing the F2 key,
-
afterwards select the 'symbol state',
-
Valid only for the functional unit 'Switch': Click on the drop-down list Valid State on the desired 'functional unit state':
Example 3: 'Load'
(Symbol templates from database: I07150A1)
Example 4: 'Switch'
(Symbol templates from database: I07150A1)
Example 5: 'Coil'
(Symbol template from database: I07150A1)
Assigning 'Symbol State' to Symbol Graphic
To assign the 'symbol state' to the symbol graphic:
-
right-click on the corresponding symbol in the component or symbol view in the database tree and select the command New or Edit from the displayed context menu,
-
the symbol graphic appears in the workspace for editing,
-
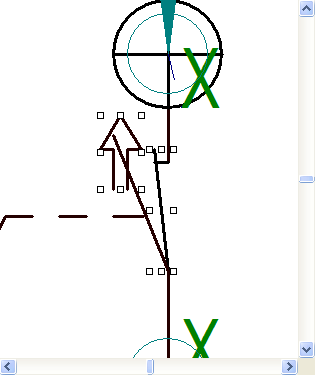
draw all possible 'symbol states' on the symbol graphic (in this case all switch positions):
-
select all graphic segments belonging only to the desired 'symbol state' using multi-select (pressing and holding the SHIFT key)
Note:
Graphic segments, which can be used for all 'symbol states', must not be additionally assigned.
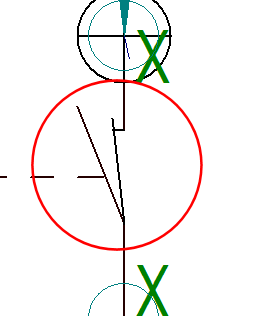
Example 'inactive state':

Example 'active state':
-
then right-click on the symbol.
Note: Two possibilities are available:
1st possibility
-
Select the command Assign State from the displayed context menu,
-
then select from the following context menu:
-
the command Next to select the next defined state
-
the command Previous to select the previous state
-
directly on the desired state
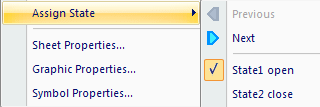
Note: The state presently selected is displayed by a check mark.
-
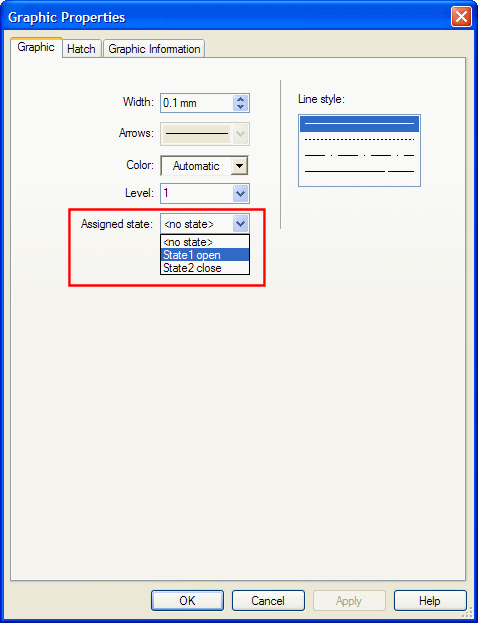
2nd possibility
-
Select the command Graphic Properties... from the displayed context menu,
-
switch to the tab Graphic,
-
select the desired state under Assigned state:
Simulating 'Symbol State' on Graphic
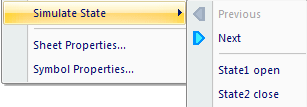
To visualize the individual symbol states on the graphic
-
right-click on the symbol sheet and select the command Simulate State from the displayed context menu and
-
then select from the following submenu
-
the command Next to select the next defined state, or
-
the command Previous to select the previous state or
-
directly on the desired state
-
Note
This context menu command is also available on a component sheet in Database Editor.