
Auto Routing
The following methods to auto route are available in E3.series:
Auto Routing for already placed pins
This connection method is used to connect free pins within a defined area.
The Insert->Autoconnect command on the Main Menu bar has the following sub-commands:
-
Inside Area

-
Inside Area Vertical

-
Inside Area Horizontal

-
From/To Area

-
Panel Autoconnect
 (only with the E3.panel and E3.cable option installed)
-
see: Autoconnect in Panel
-
To activate the Autoconnect Inside Area command
-
select the Insert -> Autoconnect -> Inside Area option or
-
select the corresponding button on the Connect Toolbar
Upon selection of the command, the desired area is defined by digitizing the opposite corners of a rectangle within the drawing area. The system then tries to connect all connect nodes by creating graphical connect lines in both vertical and horizontal directions.
The preferred direction defined in Tools -> Settings -> Connection defines the direction that is tried first.
The preferred direction defined in the IDD_OPTION_CONNECT.htmTools -> Settings -> Connection menu has no effect on the Inside Area Vertical and Inside Area Horizontal commands.
To activate the Autoconnect From/To Area command
-
select the Insert -> Autoconnect -> From/To Area option or
-
select the corresponding button on the Connect Toolbar
Upon activation of the command, a 'from' area is defined by digitizing the opposite corners of a rectangle within the drawing area. This 'from' area must not be a square, because the longest side of the rectangle, determines the direction, either horizontally or vertically, in which the 'to' area can be placed.
Once the 'start' area has been defined, another area of the same size, i.e. the 'to' area, is displayed on the cursor. This 'to' area is positioned by digitizing a third point.
The preferred direction defined in Tools -> Settings -> Connection has no effect on this command, but instead is determined by the relative positions of the 'from' and 'to' areas.
Also, this command doesn't create connect lines inside the area itself, but only from connect nodes within the 'from' area to connect nodes or connect lines within the 'to' area.
Signal creation and modification are exactly the same for user-defined connections as connections created with the Autoconnect commands.
Auto Routing after Placing / Moving
This routing method is used to control whether
-
horizontal/vertical connection lines shall be created automatically on possible pins at device placement
-
already connected connection lines at device movements shall also be moved automatically
For this, there are the following options in the settings within the category Auto Routing in the area Routing mode:
-
Horizontally after placing
-
Vertically after placing
-
After moving
Horizontally after placing
If checked, horizontal connection lines are generated when auto routing. In doing so, the pins are connected with those lying directly across from them.
Example

![]()
Vertically after placing
If checked, vertical connection lines are generated when auto routing. In doing so, the pins are connected with those directly above them.
Example

![]()
After moving
If checked, already connected connection lines remain when moving devices. (If possible, go around obstacles).
Example

![]()

Note
-
Net attributes and net segment attributes remain after moving.
-
The line type retains the same line type. For different line types the default line type is used.
-
When pins are not located within the set grid, a minimum distance of two grid points between the two pins to be connected must be observed.
Auto Route by Conductor / Wire
It's also possible to graphically connect selected pins, on which the same
Note
Diverse settings for this function can be defined within the area Router settings (in the settings under Auto Routing).
Note
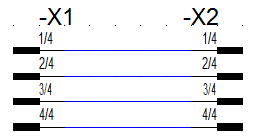
In the following example the same wire is placed on all pins horizontally across from one another.
To do so, proceed as follows:
-
Select at least two symbol pins with the same

-
select the context menu command Auto Route -> By

-
Note:
If the command Auto Route -> By

Auto Routing by Signal
It's also possible to graphically connect selected pins with the same signal to one another.
Note
Diverse settings for this function can be defined within the area Router settings (in the settings under Auto Routing).
Note
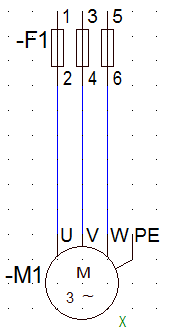
In the following example all pins have the same signal.
To do so, proceed as follows:
-
Select at least two symbols with the same signal using multi-select and then right-click

-
select the context menu command Auto Route -> By Signal:

-
Note:
If the command Auto Route -> By Signal is executed on the sheet, all placed symbols with the same signal are graphically connected with one another:
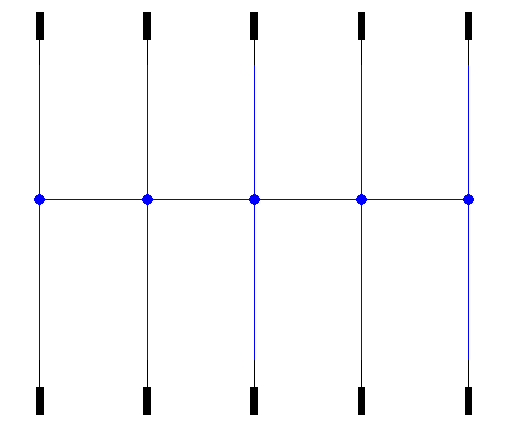
Auto Route by Selection
This connection method enables the user to graphically connect selected pins which have the same signal.
How to generate auto routing between two pins
-
right-click anywhere on the sheet and select the context menu command Auto Route -> By Selection or click on the icon Auto Route -> By Selection
 in the Connect toolbar.
-
Note:
-
By double-clicking on the icon Auto Route -> By Selection
the command can be repeated. -
This functionality can only be executed on a formboard by using this icon.
-
-
-
Left-click to select the start pin:

-
Next select the target pin with a left-click:

-
The connection is generated according to the defined connection settings (under Settings -> Auto Route):
