
Sheet Table
To quickly and easily edit sheets also in larger projects, a sheet table is available.
Displaying the Sheet Table
After having selected the View -> Sheet Table command from the Main menu bar, a window opens displaying an Excel-like table describing each sheet contained in the project in a separate row.
The columns contain the following information
-
Sheet name
-
Assignment
-
Location
-
All attributes with the owner 'Sheet' and all sheet texts can be defined as columns (See also: Displaying attributes and text types in additional columns).
'Jump to' Sheet Table, Sheet and Sheet Tree
The 'Jump to' functionality allows to quickly and easily switch to objects that are already placed in the drawing.
It's also possible to directly jump to the Sheet Table or from the Sheet Table to the desired sheet or the Sheet tree.
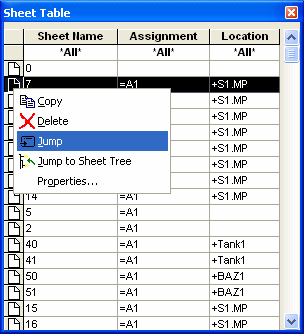
Right-click on the desired row in the Sheet Table and select the Jump to command to open the desired sheet.
To activate the sheet in the Sheet tree of the Project window, select the Jump to Sheet tree or double-click on the desired sheet.
To jump from a sheet to the Sheet Table
-
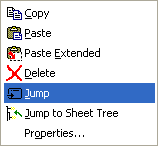
right-click on the desired sheet in the Sheet tree and select the Jump to Sheet Table command from the displayed context menu, or
-
right-click on the desired sheet that is currently edited and select the Jump to -> Jump to Sheet Table command from the displayed context menu.
The Jump to Sheet Table command open the Sheet Table, if not yet displayed, with the corresponding row being open and active.
Copying, Inserting, Deleting and Modifying Their Properties in the Sheet Table
To copy a sheet
-
select the desired row in the Sheet Table, right-click and select the Copy command from the displayed context menu.
The sheet is written to a temporary subcircuit.
-
This subcircuit is overwritten with each additional copying event from the Sheet table.
To insert a copied or new sheet,
-
select a row in the Sheet Table, right-click in the left-hand margin and select the Paste or Paste Extended command from the displayed context menu. The sheets in the clipboard are inserted. After using Paste Extended the previously copied sheet in the clipboard is inserted.
-
Select the empty row at the end of the Sheet Table, right-click in the left-hand margin and select the Add Sheet command from the displayed context menu (Insert New Sheet dialog opens) or type a new name in the empty row at the end of the Sheet Table and a new sheet with last sheet format and characteristic used will be inserted.
To delete a sheet,
-
select the desired row in the Sheet Table, right-click in the left-hand margin and select the Delete command from the displayed context menu. The sheet is deleted from the sheet list in the Project Window tree view and the drawing.
-
Elements (symbols) of a device previously placed on the sheet can be placed again. One can see this in the Device Tree of the Project Window.
To change or display the properties of a sheet as usual,
-
select the desired row in the Sheet Table, right-click in the left-hand margin and select the Properties... command from the displayed context menu.
-
It's also possible to change the properties of several sheets simultaneously. With CTRL+Left mouse button several sheets can be selected simultaneously. With SHIFT+Left mouse button a complete area can be selected.