Handling Sheets
Always create, delete, display, close and navigate between sheets by working in the Sheet View of the Project Window.
To display or close an existing sheet,
-
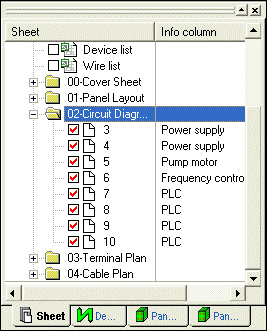
click in the checkbox of a sheet, or double-click on the sheet name, and the selected sheet will appear in a separate window within the Viewing Area. The window will close then the checkbox is un-checked.

-
Right-click on any folder and select the Open command from the displayed context menu to display all sheets contained in this folder.
Note
This command does not open the folder in the Sheet tree view.
Selecting the Close command from the context menu displayed by right-clicking on any folder closes all sheets contained in this folder.
Note
This command does not close the folder in the Sheet tree view.
-
Open sheet windows can also be closed by clicking the Close button (X) of its window.
-
Open sheet windows can also be brought to the top by selecting Window -> <n> Sheet: <name> from the Main Menu bar, or if the drawing windows are cascaded, by clicking on any part of the window that is visible, or by double-clicking on the sheet name in the Sheet View of the Project Window or by using the key combination Ctrl+TAB in the viewing area.
Remark
When ending or closing a project, the system user-specifically saves the last sheet view, i.e. full screen or window view, in which sheets appear upon opening/creating in new or existing projects.
To add a new sheet,
-
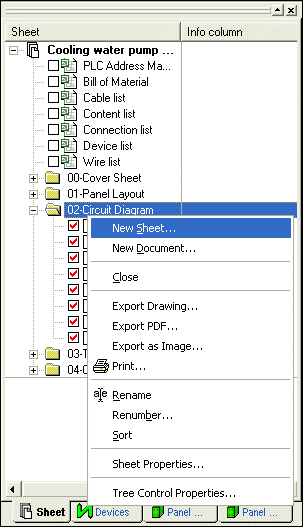
Either right-click on any object (sheet, folder) in the Sheet tree view of the Project Window and select New Sheet... from the displayed context menu,

-
or use Insert -> Sheet... from the Main Menu.
-
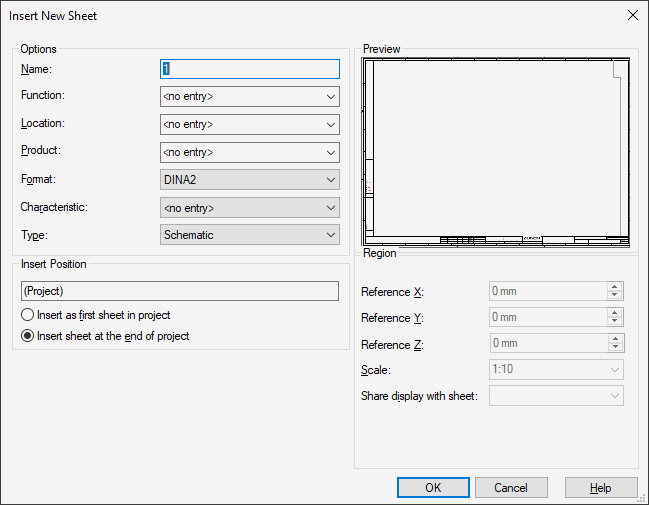
Enter the Name and select a Format in the respective fields of the displayed dialog window and click OK.
Note: The following characters must NOT be used for sheet names: blanks, curly brackets: left/right, angle brackets: left/right, comma, semicolon, apostrophe

-
The new sheet will appear in a separate window within the Viewing Area. It is then inserted either before, or after, the current sheet in the Sheet Tree View of the Project Window by selecting the appropriate radio button.
-
The Region section is only active, if a E3.panel or E3.formboard license is available and 'Panel' or 'Formboard' is selected as Sheet type.
To rename an existing sheet,
-
Select Format ->Sheet Properties on the Main Menu bar, or
-
right-click on the sheet name in the Sheet Tree View and select Sheet Properties from the displayed context menu, or
-
right click anywhere on the sheet and select Sheet Properties from the displayed context menu.
-
A new name can be entered in the Name field of the Sheet Properties dialog box.
-
Alternatively, by right-clicking on the sheet name in the Sheet Tree View and selecting Rename from the displayed context menu, the sheet can be renamed directly in the Sheet Tree View.
-
Or press F2 with the desired sheet name selected in the Sheet tree view.
The system checks whether the specified name exists already. Sheet names may comprise both uppercase- and lowercase characters, however, the setting with Settings -> Placement -> Import has to be considered.
When the Create unique sheet names option is checked, it is impossible to create a sheet 'test' and another sheet 'TEST' within one project. When this option is unchecked, the system does not verify uppercase and lowercase characters.
Note: The following characters must NOT be used for sheet names: blanks, curly brackets: left/right, angle brackets: left/right, comma, semicolon, apostrophe
To delete an existing sheet,
-
In the Sheet View, right-click on an existing sheet name and select Delete from the displayed context menu or press the Canc key.
-
The sheet will be completely removed from the display and deleted from the drawing. It's name will also be removed from the list in the Sheet View of the Project Window.
-
The parts (symbols) of a device that had been previously placed on that sheet will now revert to being unused and will be indicated as such on the Device View within the Project Window.
To group sheets
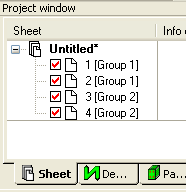
To be able to handle e.g. a function that is spread over several sheets, it's possible to merge several sheets to a group.

To group the desired sheets please proceed as follows:
-
Right-click on the desired sheets in the Sheet tree view structure of the Project Window and select the Group Objects command from the displayed context menu.
-
Remarks
-
The grouping commands in the main menu under Edit as well as the affiliated grouping toolbar buttons for graphics and objects are inactive, when sheets are selected in the Sheet tree view.
-
Placed objects can no longer be deleted or moved after a sheet group has been created. To delete or move these objects, ungroup the sheet group first.
-
To select a sheet group,
-
right-click on a sheet of the desired sheet group in the Sheet tree view structure of the Project Window and select the Select Group command from the displayed context menu.
-
Remark
-
When selecting a sheet group in the tree view while sheets of the group are opened, all placed objects on the sheet are also selected if the active sheet is part of the group. Otherwise, the first opened sheet of the group is used.
-
To resolve a sheet group,