Button Appearance
The button appearance can be modified.
How to open the "Customize - Button Appearance..." dialog
-
Select the Tools -> Customize... command from the main menu bar, and
-
right-click on the button to be modified in any toolbar or on the menu bar and select the Button Appearance... command from the displayed context menu.
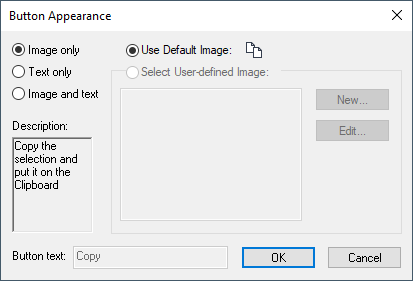
The following dialog box appears:
Image: Dialog "Customize - Button Appearance..."

Description of the dialog "Customize - Button Appearance..."
Image only
The selected symbol is displayed in the toolbar only as a push button.
Image: Example

This option is not active when opening this dialog for a new menu.
Text only
The selected symbol is displayed in the toolbar only as text.
Image: Example

The text can be defined, when opening the dialog for the new menu/submenu.
Image and text
The selected symbol is displayed in the toolbar as a push button including the text.
Image: Example

This option is not active when opening this dialog for a new menu.
Description
Describes the command of the selected symbol.
Button text
The push button text can be adapted as desired. This field is only active when either the 'Text only' or 'Image and text' option is checked.
Use default image
The default image is predefined by E3.series and cannot be changed.
The display can also be adapted directly using the context menu (that can only be displayed when the Customize dialog is open) offers several commands to handle the toolbars and icon arrangement:
Image: Context Menu

Reset to Default
The modified display can be returned to its original state, i.e. only image.
Copy Button Image
Copies the button image to the clipboard.
Delete
Removes the icon from the toolbar.
Button Appearance....
A dialog appears to modify the button appearance. See above.
Image
Activating this option displays the command's image (icon) only.
Text
Activating this option displays the command's text only.
Image and Text
Activating the option displays the command's image and text.
Start Group
Adds a separator to a toolbar, i.e. optically separates icons from each other. The separator is added in front of the icon on which the command is selected and the group starts with the icon selected.
To remove this separator, i.e. to resolve the group, right-click on the icon in front of which the separator is to be removed, and click on the Start Group command to uncheck it.